
Ansible 노드 구성

- 암호로 인증을 하겠다는 옵션
[root@control_node ~]# ansible all -m ping -k
# -k(= --ask-pass): 암호로 인증을 하겠다는 옵션

# 연결성을 테스트하는 모듈: icmp 패킷을 보내는 프로토콜이 아니라 ping 요청에 대해 pong을 반환하는 모듈
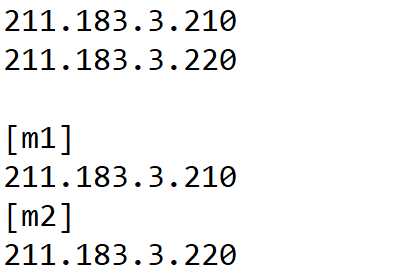
[root@control_node ~]# vi /etc/ansible/hosts
[m1] 211.183.3.210
[m2] 211.183.3.220
yum 모듈
대상 서버에서 패키지관리 명령(yum)을 내리는 모듈
[root@control_node ~]# ansible m1 -m yum -a "name=httpd state=present" -k
# m1: 기본 인벤토리의 [m1]서버
# -a: 인자 전달
# name: 패키지 이름
# state: 원하는 상태(desired)
# present: 존재
# -k: 암호인증

[root@m1 ~]# systemctl status httpd


멱등성
- 바람(Desired)과 현재 상태를 확인해 대조한 후 같으면 명령 수행X

# 바람(Desired state, 원하는 상태)과 현재상태(status)를 대조해서 ‘현재상태’가 ‘바램’ 수렴하게끔 함
[root@control_node ~]# ansible 211.183.3.210 -m service -a "name=httpd state=started" -k
# service: 모듈(= systemctl 비슷)
# started: 시작된 상태

[root@m1 ~]# systemctl status httpd | grep -i active

https://docs.ansible.com/ansible/latest/collections/index_module.html


실습)
m2에 httpd라는 데몬이 잘 동작하고, 재부팅후에도 동작할 수 있도록 ansible 명령을 수행해보세요.
[root@control_node ~]# ansible m2 -m yum -a "name=httpd state=present" -k
[root@control_node ~]# ansible m2 -m service -a "name=httpd state=started" -k
[root@control_node ~]# ansible m2 -m service -a "name=httpd enabled=yes" -k
# enabled=true(= yes)

앤서블로 m2의 방화벽을 켜보세요.
[root@control_node ~]# ansible m2 -m service -a "name=firewalld state=started" -k

user 모듈
사용자 관리하는 모듈
- m1 서버에서 newuser1이라는 사용자 생성
[root@control_node ~]# ansible m1 -m user -a "name=newuser1" -k

실습)
m3 서버를 한대 추가해서 m1,m2는 seoul 서버로 묶고 m3서버는 busan 서버로 묶어보세요.
- 1. vi /etc/ansible/hosts로 추가

[seoul]
211.183.3.210
211.183.3.220
[busan]
211.183.3.230
- 2. 따로 인벤토리 파일을 생성
[root@control_node ~]# vi myinven


[root@control_node ~]# ansible busan -i myinven -m service -a "name=firewalld state=started"
yes
[root@control_node ~]# ansible busan -i myinven -m service -a "name=firewalld state=started" -k
# -i: 내가 임의로 만든 인벤토리를 사용하기 위해 사용하는 옵션으로 해당 인벤토리 파일을 지정
키페어 생성
계속 암호를 치는게 불편하니까, ssh 인증을 암호가 아닌 키페어를 사용(public-key 방식)
[root@control_node ~]# ssh-keygen -b 2048 -t rsa -f ~/.ssh/id_rsa -q -N ""
# -b: bit
# -t: 암호화 타입
# -f: 파일 위치
# -q: 메세지X
# -N: passphrase(= 프라이빗키 암호 = 암호X)
# 사실상 ssh-keygen한것과 크게 다른건 없지만, 엔터를 3번 치지 않고 한번만 명령을 입력해도 키페어가 생성

- 대상서버(root@211.183.3.210 = m1)의 authorized_keys에 내 퍼블릭키 등록
[root@control_node ~]# ssh-copy-id -i ~/.ssh/id_rsa.pub root@211.183.3.210
- m1에서 authorized_keys 확인
[root@m1 ~]# vi ~/.ssh/authorized_keys

- m2, m3의 authorized_keys에 내 퍼블릭키 등록
[root@control_node ~]# ssh-copy-id -i ~/.ssh/id_rsa.pub root@211.183.3.220
[root@control_node ~]# ssh-copy-id -i ~/.ssh/id_rsa.pub root@211.183.3.230
- 퍼블릭키를 심은 후 따로 암호로 인증(-k)하지 않아도 명령이 잘 전달됨
[root@control_node ~]# ansible all -i myinven -m ping

플레이북
태스트를 모아놓은 명세표, 문서
- 모듈 : 도구 (ex. 장도리)
- 태스크 : 작업 (ex. 못박기, 못뽑기)
- 인벤토리 : managed node들의 목록
- 내가 수행하고자 하는 작업(task) = httpd라는 패키지가 설치되면 좋겠다.
→ yum이라는 도구를 사용해 state를 present로 만들면 된다. - 내가 수행하고자 하는 작업(task) = httpd라는 패키지가 없었으면 좋겠다.
→ yum이라는 도구를 사용해 state를 absent로 만들면 된다.
[root@control_node ~]# mkdir /ans
[root@control_node ~]# cd /ans/
yaml 파일
확장자를 일반적으로 yaml, yml로 사용
JSON파일과 호환되는 <key>:<value> 형태로 구성된 파일
파이썬의 자료형 중 리스트와 딕셔너리를 통해 구성
- 리스트
동물 = [“고양이”,”강아지”] - 딕셔너리
서버 = {“cpu”: 2, “ram” : 2048} - ex. state: started
state = key값 : started = value값
✅ 플레이북은 결국 다양한 태스크들을 모아놓은 파일인데, 수행할 task가 없는 플레이북 제작해보자!
- 플레이북 제작
[root@control_node ans]# vi playbook.yml
- name: playbook-name
hosts: all
tasks:

- 기본 인벤토리의 모든 서버들한테 playbook.yml이라는 플레이북 파일을 수행
[root@control_node ans]# ansible-playbook playbook.yml

- 아까 /root 경로에 만든 인벤토리 파일을 /ans로 복사
[root@control_node ans]# cp ~/myinven .
- myinven라는 인벤토리를 대상으로 playbook.yml 수행
[root@control_node ans]# ansible-playbook playbook.yml -i myinven
✅플레이북에 httpd라는 패키지를 설치하는 태스크를 추가해보자!


[root@control_node ans]# vi playbook.yml
- name: playbook-name
hosts: all
tasks:
- name: install_httpd # httpd라는 패키지를 설치하는 테스트
yum:
name: httpd
state: present
- myinven라는 인벤토리를 대상으로 playbook.yml 수행
[root@control_node ans]# ansible-playbook playbook.yml -i myinven

실습)
nginx.yml이라는 플레이북을 만들어서 busan 서버에 nginx를 설치하고 동작시켜서 접속되는 것까지 확인해보세요
풀이1)
- 플레이북 제작
[root@control_node ans]# vi nginx.yml
- name: nginx-name
hosts: busan
become: yes # root 권한 사용
tasks:
- name: Install nginx # nginx 설치
yum:
name: nginx
state: present
- name: Start and enable nginx service # nginx 시작 및 활성화
systemd:
name: nginx
state: started
enabled: yes
# httpd가 inactive가 아니라면 80 port로 겹치기 때문에 실행되지 않음
[root@control_node ans]# ansible-playbook nginx.yml -i myinven
[root@control_node ans]# ansible busan -i myinven -m service -a "name=firewalld state=stopped"

풀이2)
- m3에 가서 일단 nginx를 설치

[root@m3 ~]# yum install -y epel-release
[root@m3 ~]# yum install -y nginx
[root@m3 ~]# systemctl restart nginx


[root@m3 ~]# yum remove httpd -y

- 플레이북을 구성 (대상 = busan 서버)
플레이북
httpd의 status를 absent로 하는 태스크(필요모듈=yum)
firewalld 끄는 태스크(service모듈)
epel-release 설치하는 태스크
nginx 동작시키는 태스크
- 플레이북 제작
[root@control_node ans]# vi nginx.yml
| - name: nginx-pb hosts: busan tasks: - name: remove_httpd yum: name: httpd state: removed - name: firewalld_stopped service: name: firewalld state: stopped enabled: false # systemctl disable firewalld - name: install_epel yum: name: epel-release state: present - name: install_nginx yum: name: nginx state: present - name: start_nginx service: name: nginx state: started enabled: true |
[root@control_node ans]# ansible-playbook nginx.yml -i myinven
여러개의 패키지를 설치하는 플레이북
[root@control_node ~]# cd /ans/
[root@control_node ans]# vi multi.yml
| - name: multi_install_pb hosts: busan tasks: - name: multi_install_task yum: name: "{{ item }}" state: present with_items: - "httpd" - "net-tools" - "wget" |
[root@control_node ans]# ansible-playbook multi.yml -i myinven

- busan 서버(m3)에 ifconfig명령이 존재함 → net-tools가 잘 설치됨 확인

copy 모듈
컨트롤 노드에 존재하는 파일을 매니지드 서버에 복사
물론 매니지드-매니지드 복사 가능(remote_src)
내가 원하는 상태 = 웹서버를 설치 및 동작 시키고, index.html 복사
- 넣어줄 index.html 파일 생성
[root@control_node ans]# echo test_copy > index.html
- centos7에 nginx를 설치하면 웹루트디렉토리가 /usr/share/nginx/html

# m1서버에 아까 httpd를 제거하고, nginx를 설치했기때문에 /var/www/html 경로가 삭제됐음
- 플레이북 생성
[root@control_node ans]# vi copy.yml
| - name: copy_index_pb hosts: seoul tasks: - name: install_nginx yum: name: ['epel-release','nginx'] state: present - name: start_nginx service: name: nginx state: started enabled: true - name: copy_file_task copy: src: /ans/index.html dest: /usr/share/nginx/html/index.html |
[root@control_node ans]# ansible-playbook copy.yml -i myinven

lineinfile 모듈
[root@control_node ans]# vi lineinfile.yml
| - name: lineinfile_pb hosts: busan tasks: - name: lineinfile lineinfile: path: /usr/share/nginx/html/index.html line: "line in file test" |
[root@control_node ans]# ansible-playbook lineinfile.yml -i myinven
- index.html 파일을 삭제
[root@m3 ~]# rm /usr/share/nginx/html/index.html
- create 옵션으로 파일을 생성 후 내용 추가
create: true

[root@control_node ans]# ansible-playbook lineinfile.yml -i myinven

file 모듈
파일 생성 및 권한 부여
[root@control_node ans]# vi file.yml
| - name: make_file_pb hosts: busan tasks: - name: make_file_task file: path: /touch-test.txt state: touch mode: '0777' # 777앞의 0은 8진수를 의미 |
[root@control_node ans]# ansible-playbook file.yml -i myinven

실습)
rapa.inven이라는 인벤토리파일을 하나 만든후 [web] 목록을 하나 만든다,
[web]에 속하는 서버는 IP가 211.183.3.150,211.183.3.160인 서버이며 여기에 간단한 index.html 파일을 넣으려는데,
해당 파일은 웹상의 https://www.w3.org/TR/PNG/iso_8859-1.txt 이 파일을 받아오고자 한다.
노드에 따로 파일을 다운받아서 넣지 말고, wget 같은 모듈을 찾아서 한번 해보세요.
- 서버 두개 생성해서 퍼블릭키를 넣기
ssh-copy-id -i ~/.ssh/id_rsa.pub root@211.183.3.150
ssh-copy-id -i ~/.ssh/id_rsa.pub root@211.183.3.160
- 인벤토리 생성
[root@control_node ans]# vi rapa.inven
[web]
211.183.3.150
211.183.3.160
- 플레이북 생성
[root@control_node ~]# cd /ans/
[root@control_node ans]# vi web.yml
- name: deploy_index_pb
  hosts: web
  tasks:
  - name: firewalld_stopped
    service:
      name: firewalld
      state: stopped
      enabled: false # systemctl disable firewalld

  - name: install_epel
    yum:
      name: epel-release
      state: present

  - name: install_nginx
    yum:
      name: nginx
      state: present

  - name: start_nginx
    service:
      name: nginx
      state: started
      enabled: true

  - name: download_index_task
    get_url:
      url: https://www.w3.org/TR/PNG/iso_8859-1.txt
      dest: /usr/share/nginx/html/index.html
      force: yes  # 기존 파일을 덮어쓰기
[root@control_node ans]# ansible-playbook filedown.yml -i rapa.inven

shell 모듈
명령을 수행하는 shell 모듈의 경우, 단순히 명령을 수행하기때문에 멱등성이 보장되지 않는다.
→ shell 모듈은 멱등성이 보장되지 않기때문에 만약 대체 가능한 모듈이 있다면 그 모듈을 사용하는게 좋음
[root@control_node ans]# vi shell.yml
- name: shell_test_pb
  hosts: web
  tasks:
  - name: shell_test_task
    shell: "{{ item }}"
    with_items:
    - "mkdir /shelltest"
    - "cp /root/anaconda-ks.cfg /shelltest"
- "ls -al /shelltest"- 플레이북 수행
[root@control_node ans]# ansible-playbook shell.yml -i rapa.inven

# 플레이북에서 shell 명령을 잘 수행했다.
실습1)
인벤토리의 [web] 서버들을 대상으로 하여 프리템플릿(고양이)을 배포해보세요.
[root@control_node ans]# vi tem.yml
| - name: deploy_tem_pb hosts: web tasks: - name: firewalld_stopped service: name: firewalld state: stopped enabled: false # systemctl disable firewalld - name: install_epel yum: name: epel-release state: present - name: install_nginx yum: name: nginx state: present - name: start_nginx service: name: nginx state: started enabled: true - name: get_free_tem get_url: url: https://www.free-css.com/assets/files/free-css-templates/download/page169/the-cat.zip dest: /root/tem.zip - name: install_unzip yum: name: unzip state: present - name: unarchive unarchive: src: /root/tem.zip remote_src: yes dest: /usr/share/nginx/html |
[root@control_node ans]# ansible-playbook tem.yml -i web
실습2)
앤서블 플레이북을 통해 m3는 nfs-server로, m1은 nfs-client로 구성해보세요.
- 인벤토리 생성
[root@control_node ans]# vi /root/nfsinven
[nfs_server]
211.183.3.230

[nfs_client]
211.183.3.210- 인벤토리 복사
[root@control_node ans]# cp ~/nfsinven .
- 플레이북 생성
[root@control_node ans]# vi nfs.yml
- name: nfs_pb
  hosts: all
  become: yes
  tasks:

  # ✅ NFS 서버 설정 (m3)
  - name: Install NFS server packages (Ubuntu/Debian)
    apt:
      name: nfs-kernel-server
      state: present
    when: ansible_os_family == "Debian"

  - name: Install NFS server packages (CentOS/RHEL)
    yum:
      name: nfs-utils
      state: present
    when: ansible_os_family == "RedHat"

  - name: Create NFS shared directory
    file:
      path: /srv/nfs_share
      state: directory
      mode: '0777'
    when: inventory_hostname in groups['nfs_server']

  - name: Configure NFS export
    lineinfile:
      path: /etc/exports
      line: "/srv/nfs_share 211.183.3.210(rw,sync,no_root_squash)"
      create: yes
    when: inventory_hostname in groups['nfs_server']

  - name: Restart NFS server (Ubuntu/Debian)
    service:
      name: nfs-kernel-server
      state: restarted
    when: ansible_os_family == "Debian"

  - name: Restart NFS server (CentOS/RHEL)
    service:
      name: nfs-server
      state: restarted
    when: ansible_os_family == "RedHat"

  # ✅ NFS 클라이언트 설정 (m1)
  - name: Install NFS client packages (Ubuntu/Debian)
    apt:
      name: nfs-common
      state: present
    when: ansible_os_family == "Debian"

  - name: Install NFS client packages (CentOS/RHEL)
    yum:
      name: nfs-utils
      state: present
    when: ansible_os_family == "RedHat"

  - name: Create mount directory
    file:
      path: /mnt/nfs_share
      state: directory
      mode: '0755'
    when: inventory_hostname in groups['nfs_client']

  - name: Mount NFS share
    mount:
      path: /mnt/nfs_share
      src: "211.183.3.230:/srv/nfs_share"
      fstype: nfs
      opts: defaults
      state: mounted
when: inventory_hostname in groups['nfs_client']- 플레이북 실행
[root@control_node ans]# ansible-playbook nfs.yml -i nfsinven

- nfs_server(m3) 확인

- nfs_client(m1) 확인

- NFS 공유 디렉터리에서 파일 테스트


풀이)
- nfs-client
[root@m4 html]# vi nfs-srv.yml
- name: nfs-srv_pb
  hosts: nfs-srv
  tasks:
  - name: disable_selinux
    selinux:
      state: disabled
  - name: stop_firewalld
    service:
      name: firewalld
      state: stopped
      enabled: false

  - name: install_nfs-utils
    yum:
      name: nfs-utils
      state: present

  - name: mkdir_shared
    file:
      path: /shared
      state: directory
      mode: '0777'

  - name: edit_exports
    lineinfile:
      path: /etc/exports
      line: "/shared *(rw,no_root_squash)"

  - name: nfs_start
    service:
      name: nfs-server
      state: restarted
[root@control_node ans]# ansible-playbook nfs-srv.yml -i rapa.inven


- nfs-client
[root@control_node ans]# vi nfs-cli.yml
- name: nfs-cli_pb
  hosts: nfs-cli
  tasks:
  - name: disable_selinux
    selinux:
      state: disabled
  - name: stop_firewalld
    service:
      name: firewalld
      state: stopped
      enabled: false

  - name: install_nfs-utils
    yum:
      name: nfs-utils
      state: present

  - name: mkdir_remote
    file:
      path: /remote
      state: directory
      mode: '0777'

  - name: mount_directory
    mount:
      name: /remote
      src: '211.183.3.150:/shared'
      fstype: nfs
      state: mounted
[root@control_node ans]# ansible-playbook nfs-cli.yml -i rapa.inven

'AWS Cloud School 8기 > Ansible' 카테고리의 다른 글
| 47일차) 2025-03-07(ubuntu template, ansible) (0) | 2025.03.07 |
|---|---|
| 45일차) 2025-03-05(Ansible, cent-tem, 클론 템플릿 생성) (0) | 2025.03.05 |